Shiitake Grow Kit Instructions
Step One
Remove the plastic lined substrate block from the box it came in. Slice the plastic lining one inch up from the bottom edge and remove all plastic above your slice. The remaining plastic acts as a tray to keep the area clean.

Plastic lined substrate block removed from box. You can use a box cutter (as pictured) or any clean, sharp blade to cut the plastic off.

We suggest cutting one inch from the bottom and slicing around the perimeter to remove the plastic. This leaves the bottom plastic on to act as a tray, which reduces mess.
Step Two
Using a spray bottle filled with clean water, spray down the entire substrate block so that the entire surface is thoroughly wet.
Step Three
Cover with a large bin or trash bag to make a “humidity dome” over the substrate block. You may also choose to place the substrate block in a container with a lid (e.g., cooler, tote, box). Make sure the enclosure is a few inches wider than the substrate block so mushrooms have room to grow. Every day, lift off the cover for a few minutes to give it fresh air, and cover it again. Lightly mist the substrate block again if it is looking dry.
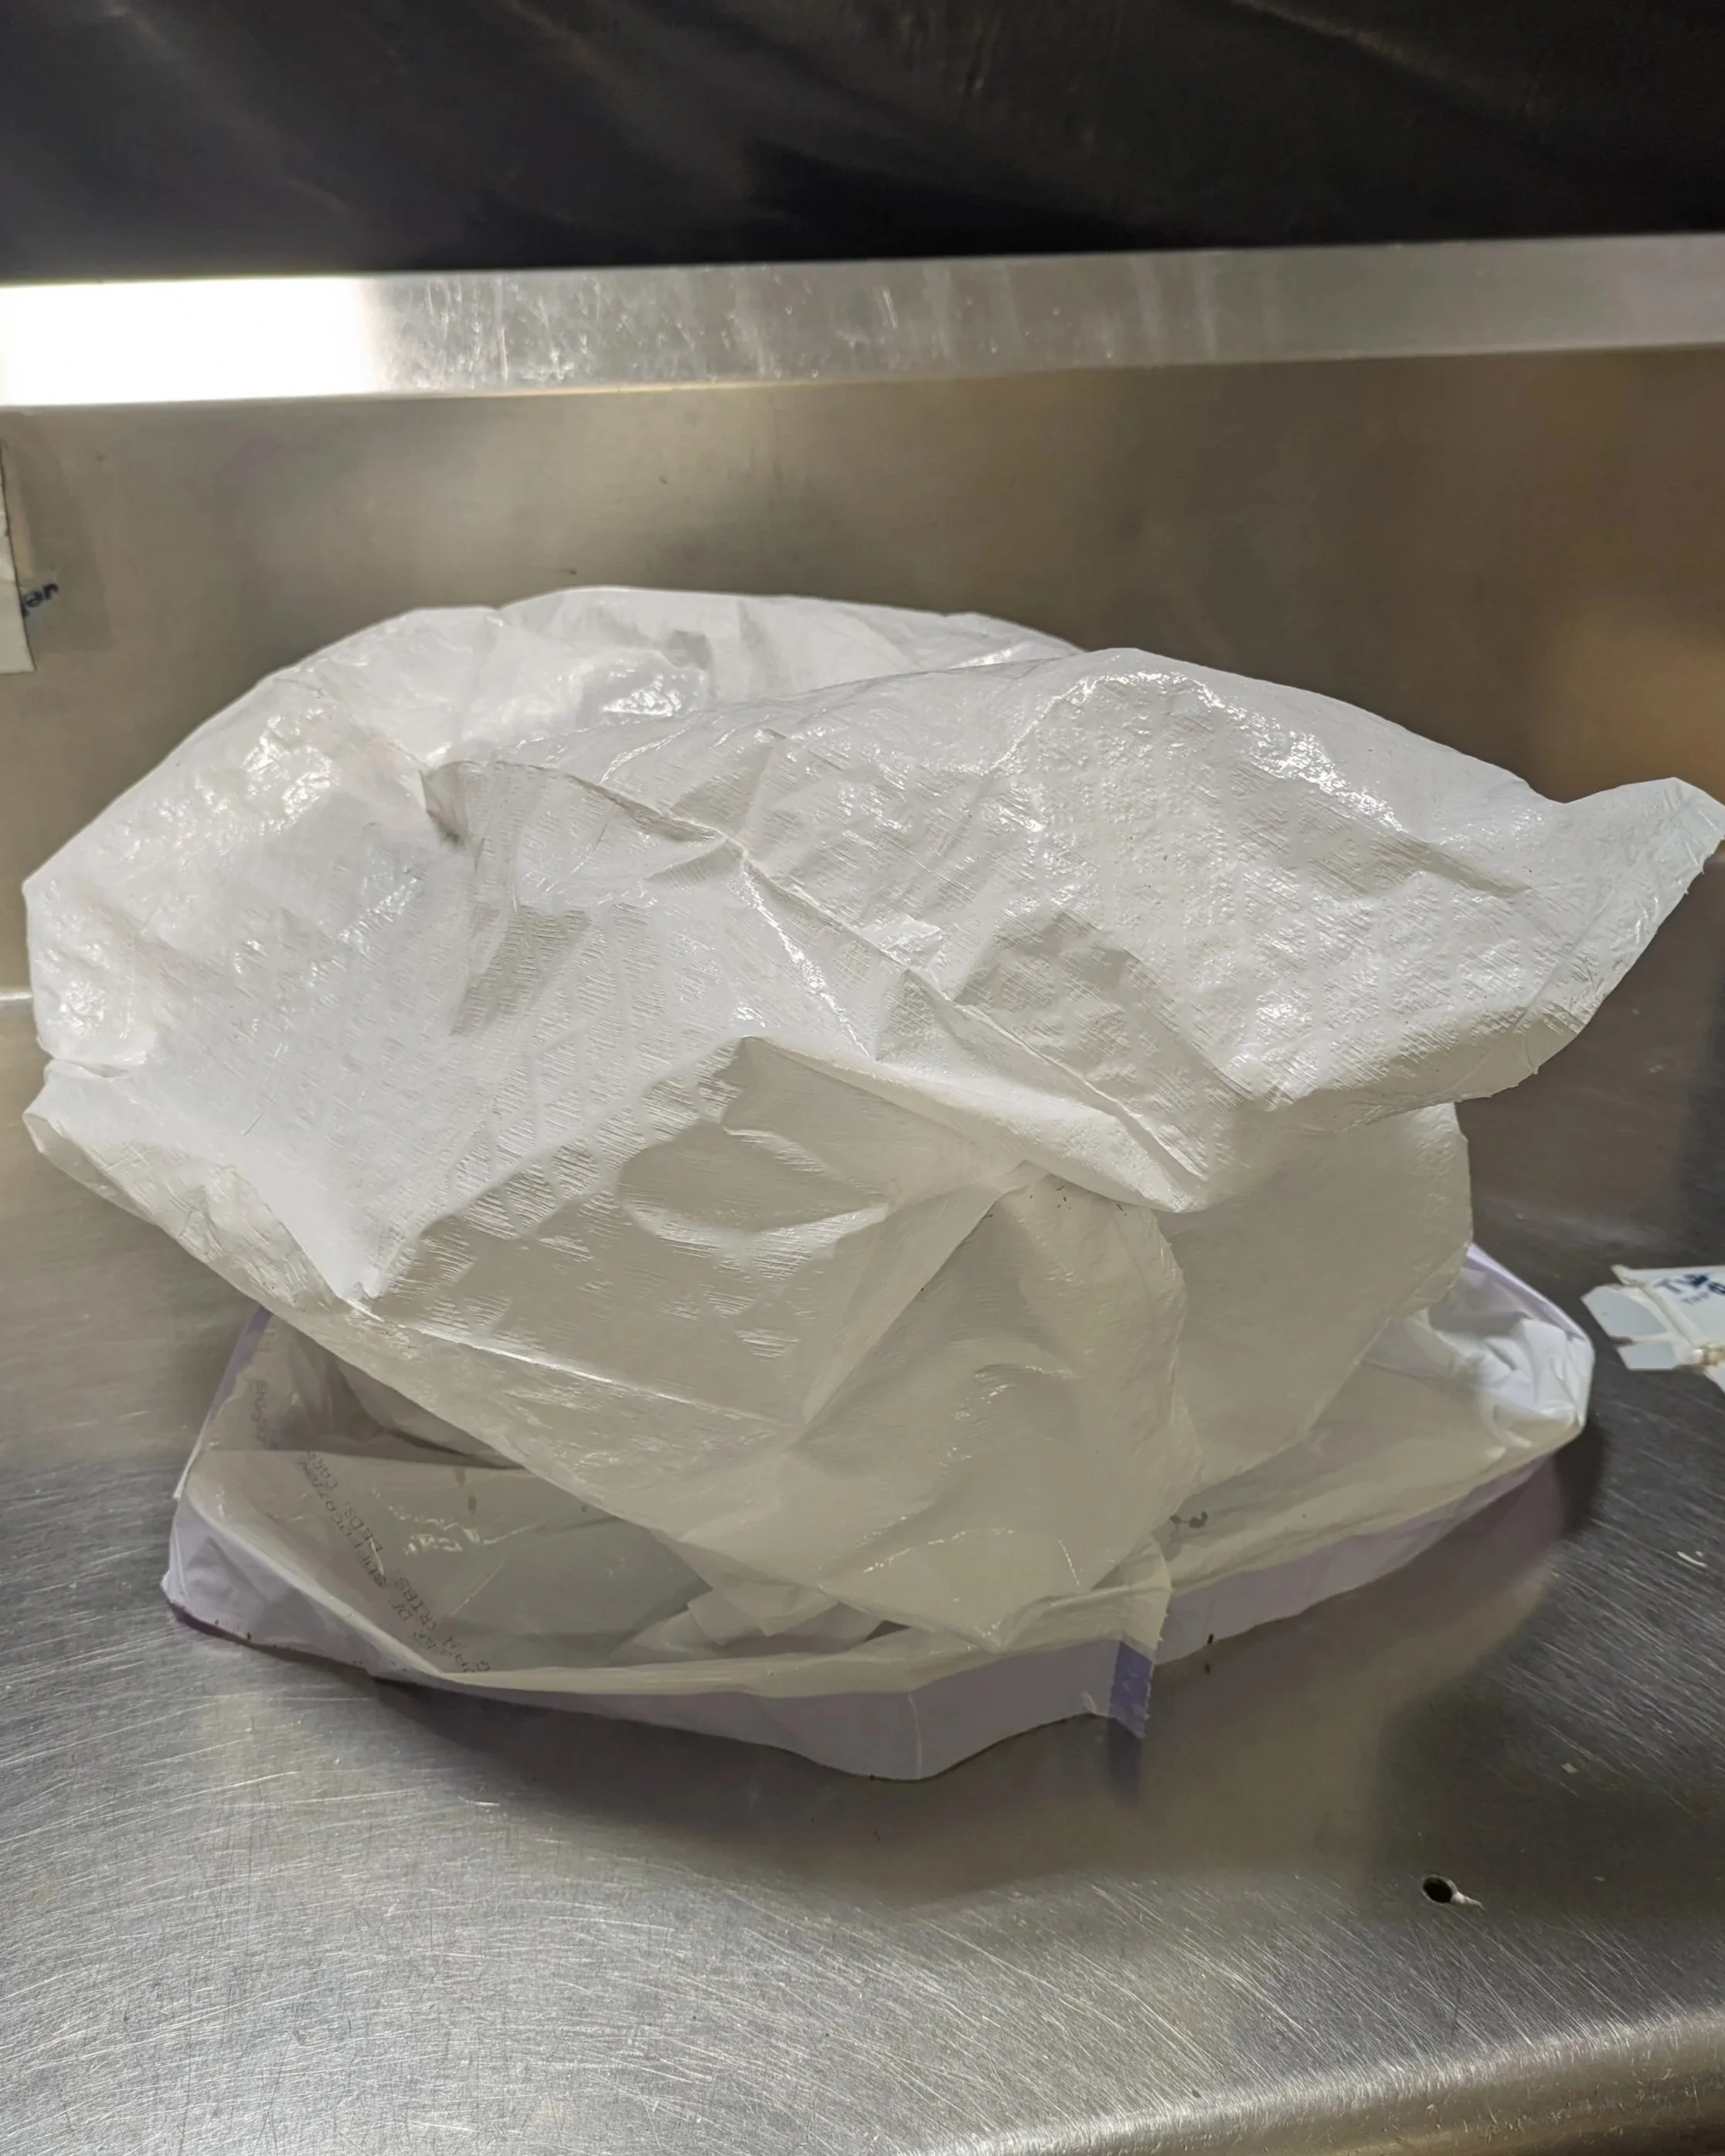
Bag over the block. Please ensure it is a bag without fragrance or other chemicals on it.
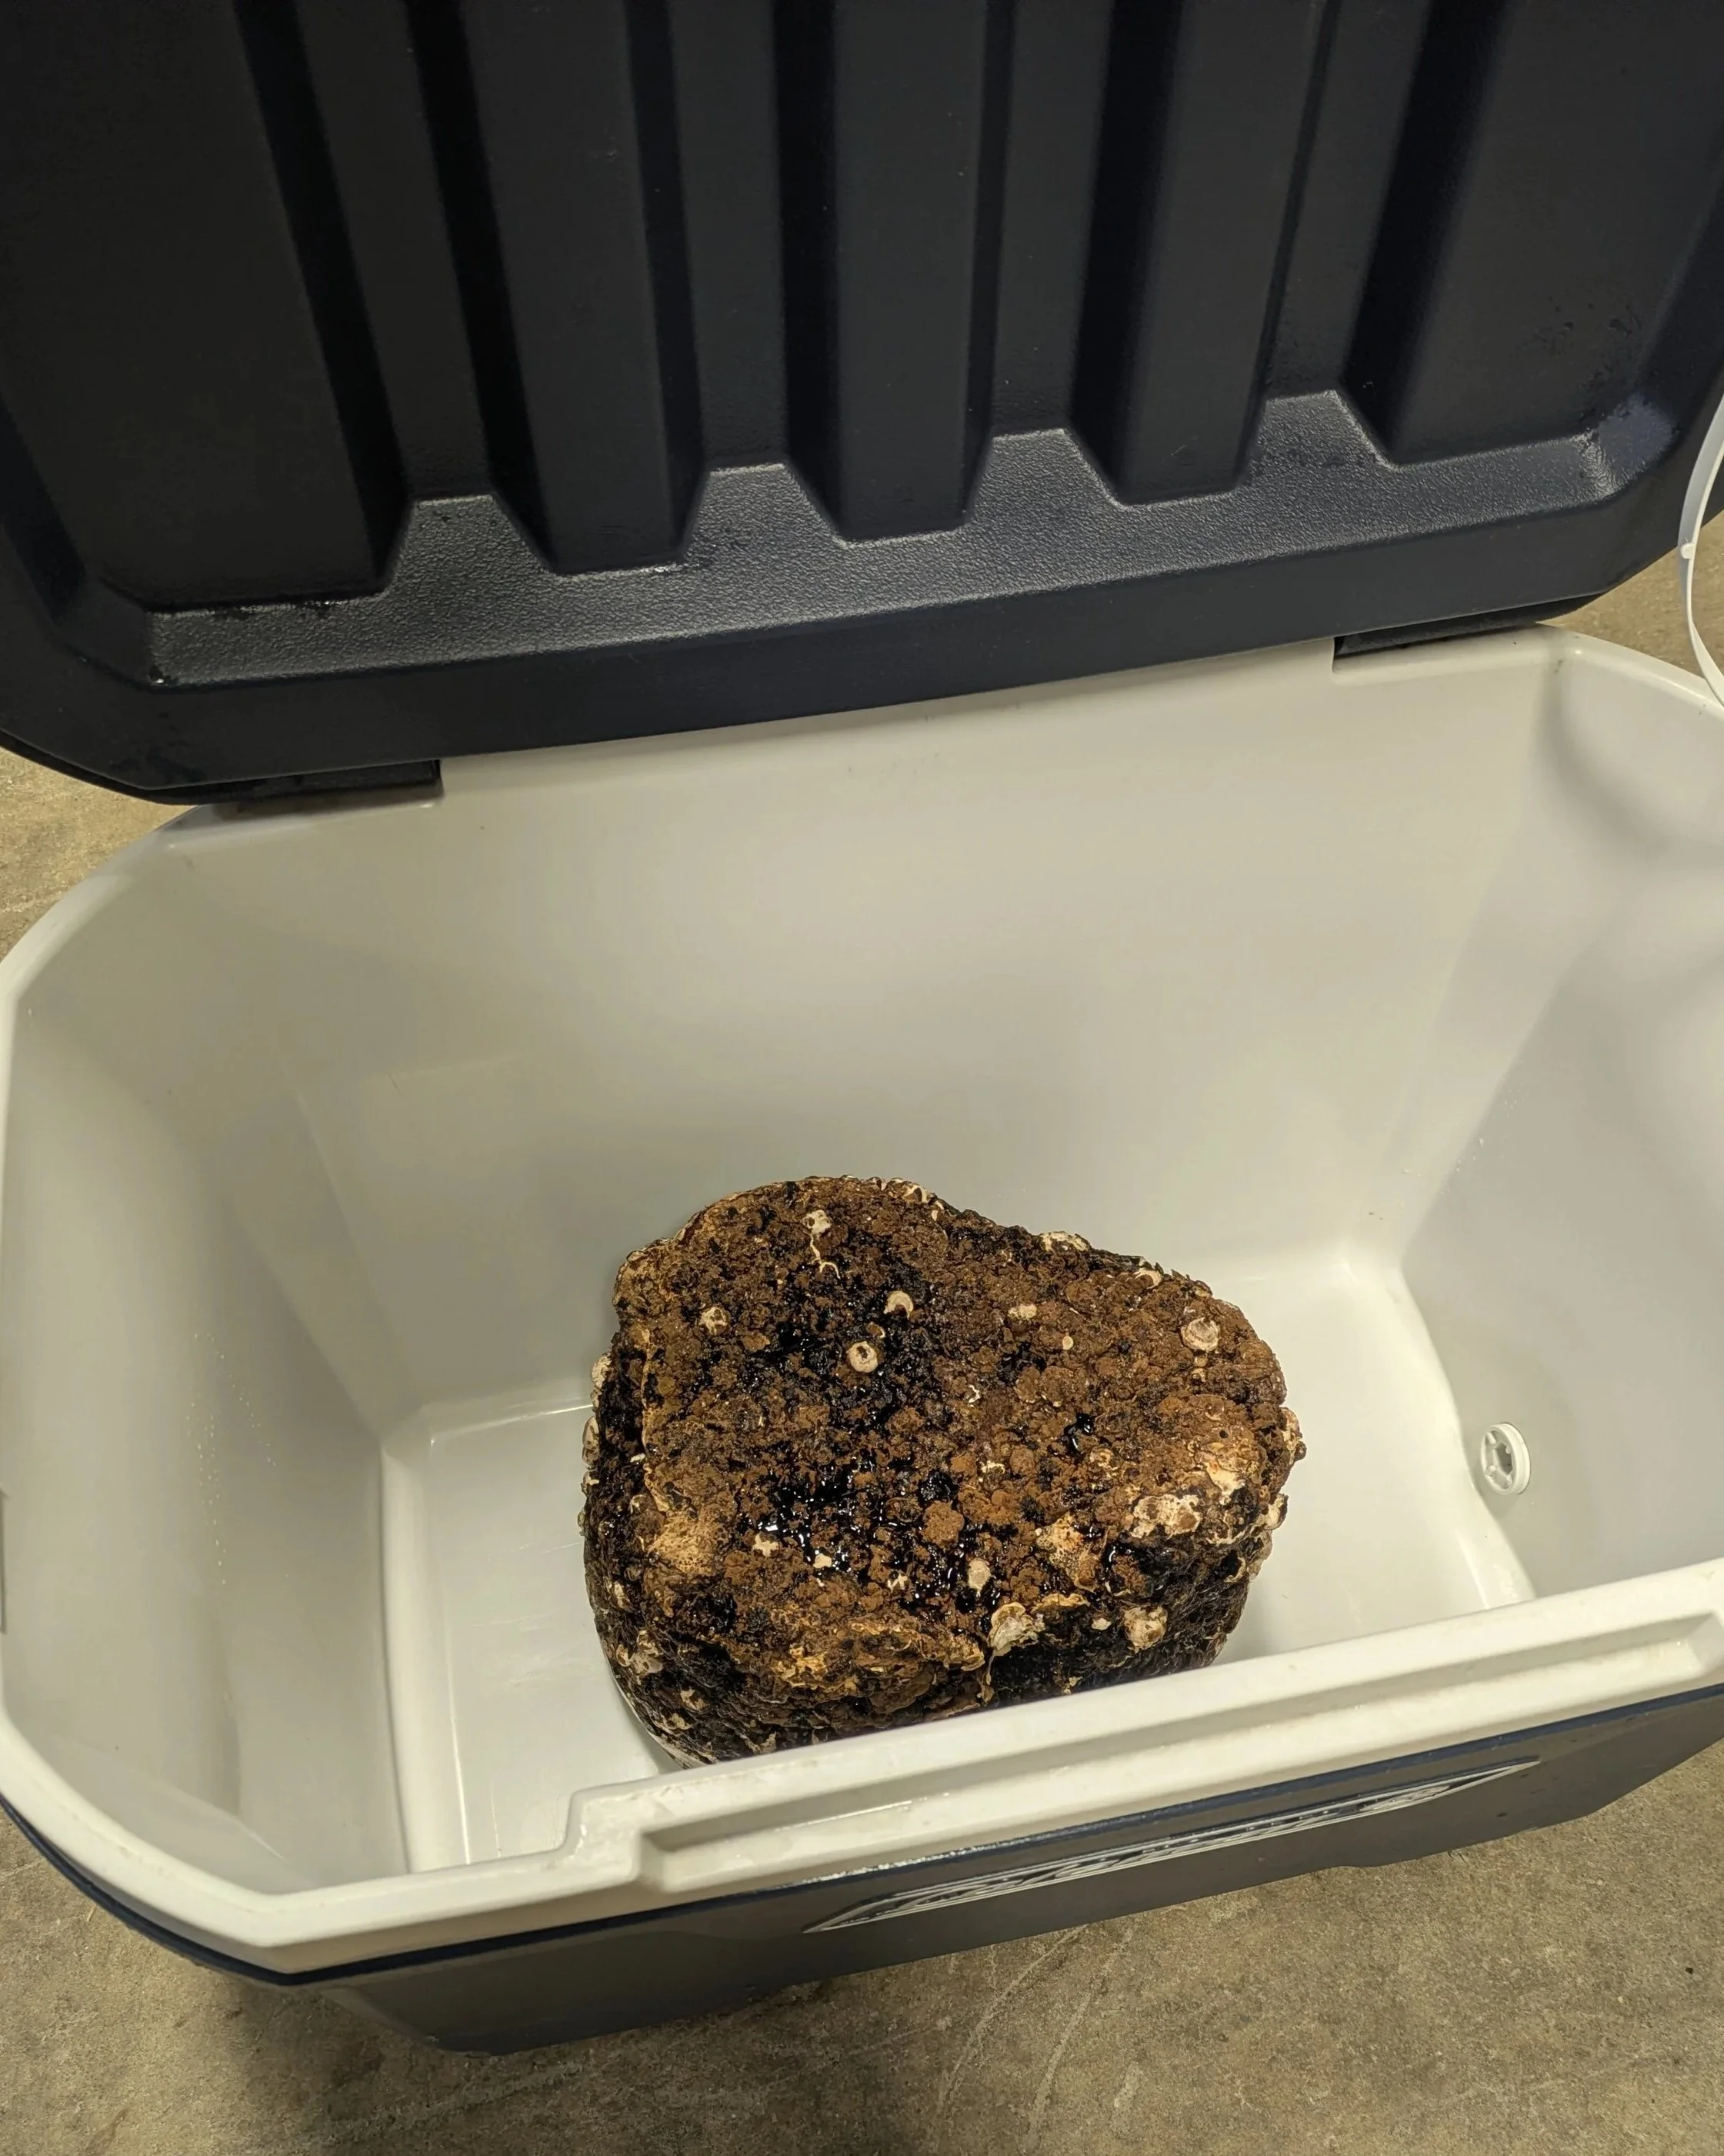
Substrate block in a cooler. After spraying it down you can close the lid. Open the lid for a few minutes every day to give it fresh air. Spray it down again only if it is looking dry.
Step Four
The mushrooms will grow in stages from the shiitake block:
First, they will appear as white/brown bumps all over the substrate block (these may already be present at time of purchase).
Then, the mushrooms will elongate their stems and form a distinguishable mushroom cap.
Finally, the caps will enlarge and begin to unfurl.
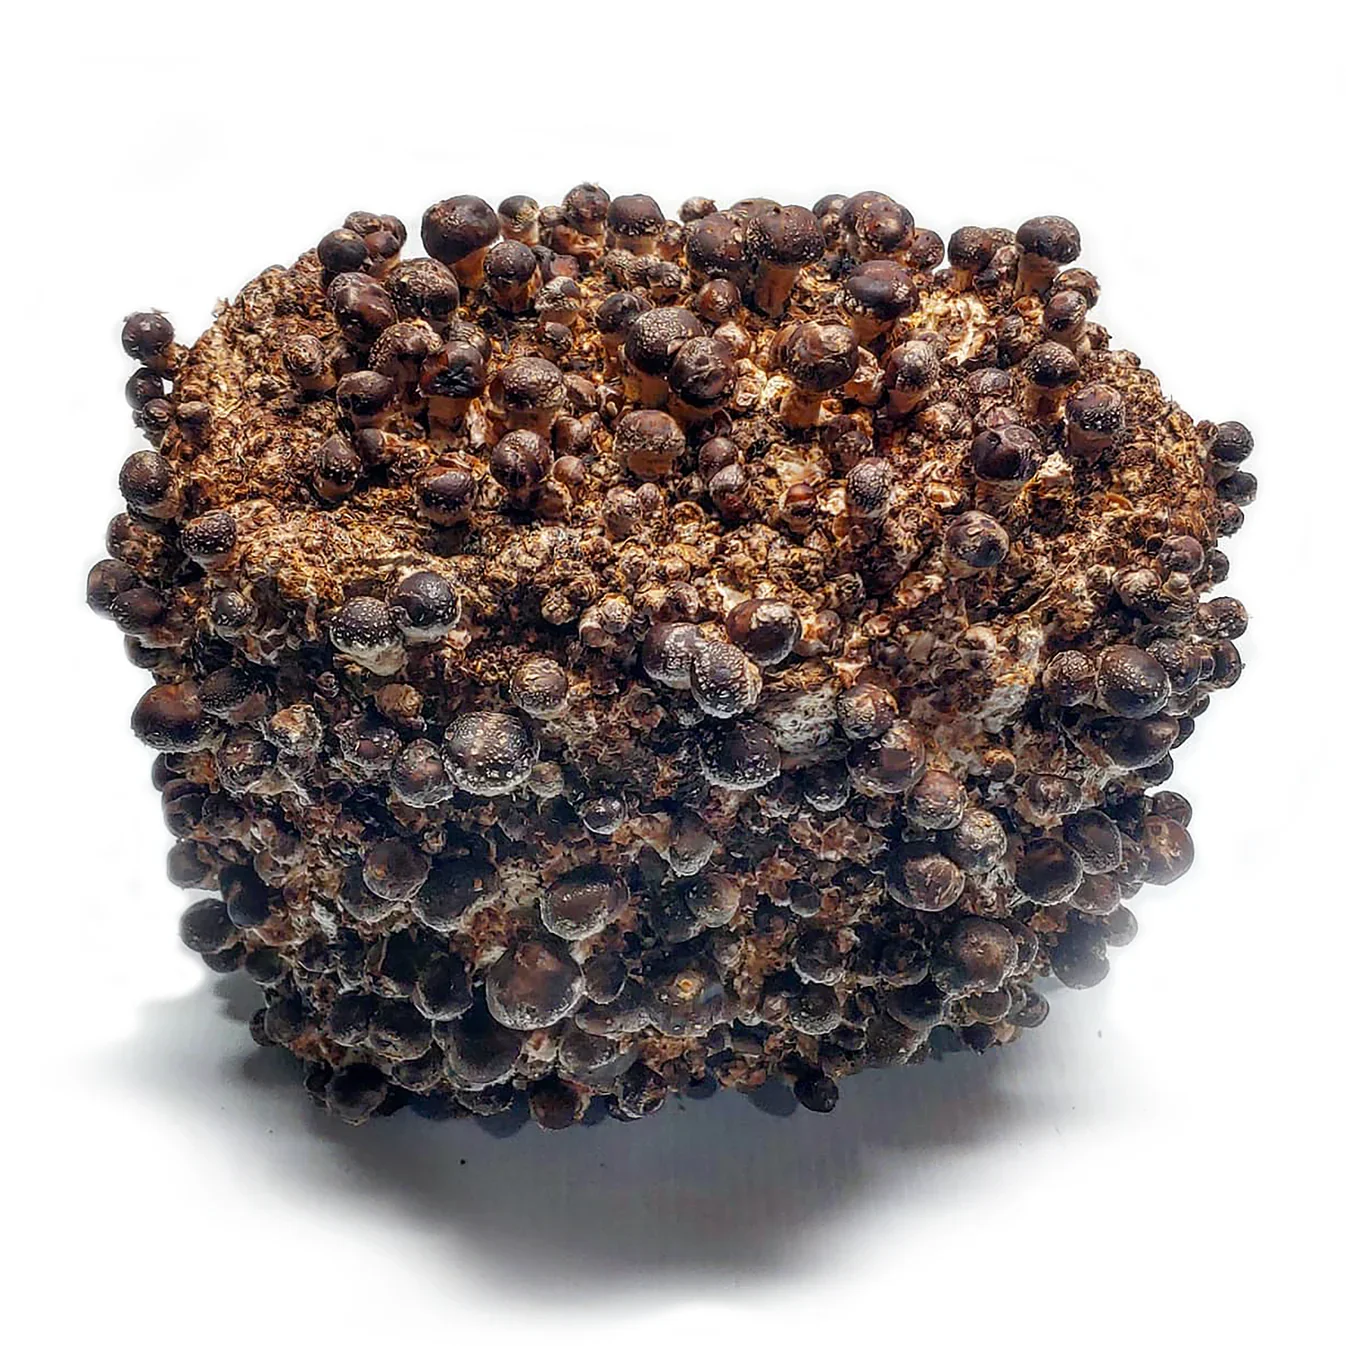
This is what baby shiitake “pins” look like as they are just starting to grow.

These are young shiitake — good enough to harvest, but if you want you can let them grow bigger.
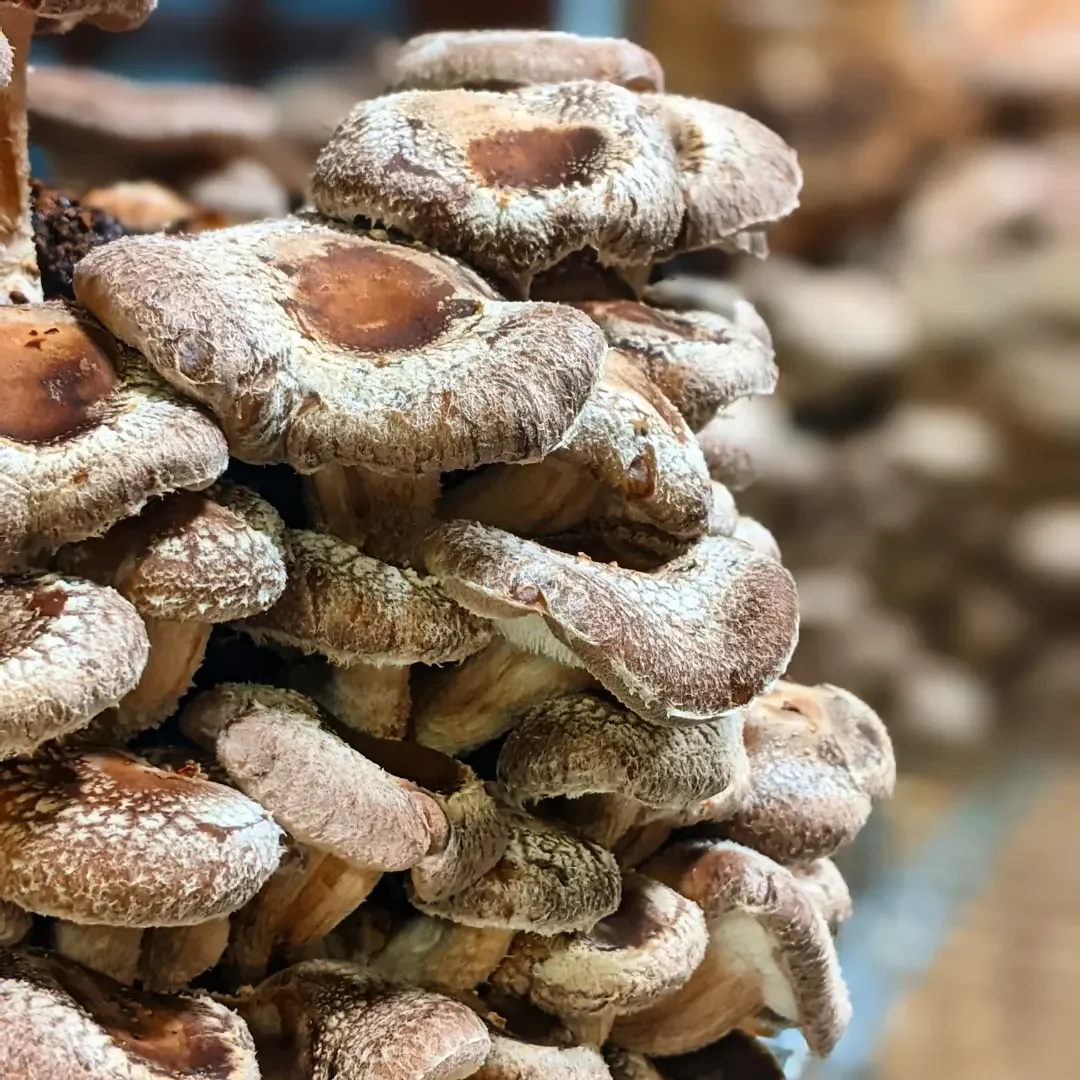
Fully grown shiitake caps. If the caps unfurl anymore and get any larger, the texture will become less meaty and the shelf life will be shorter.
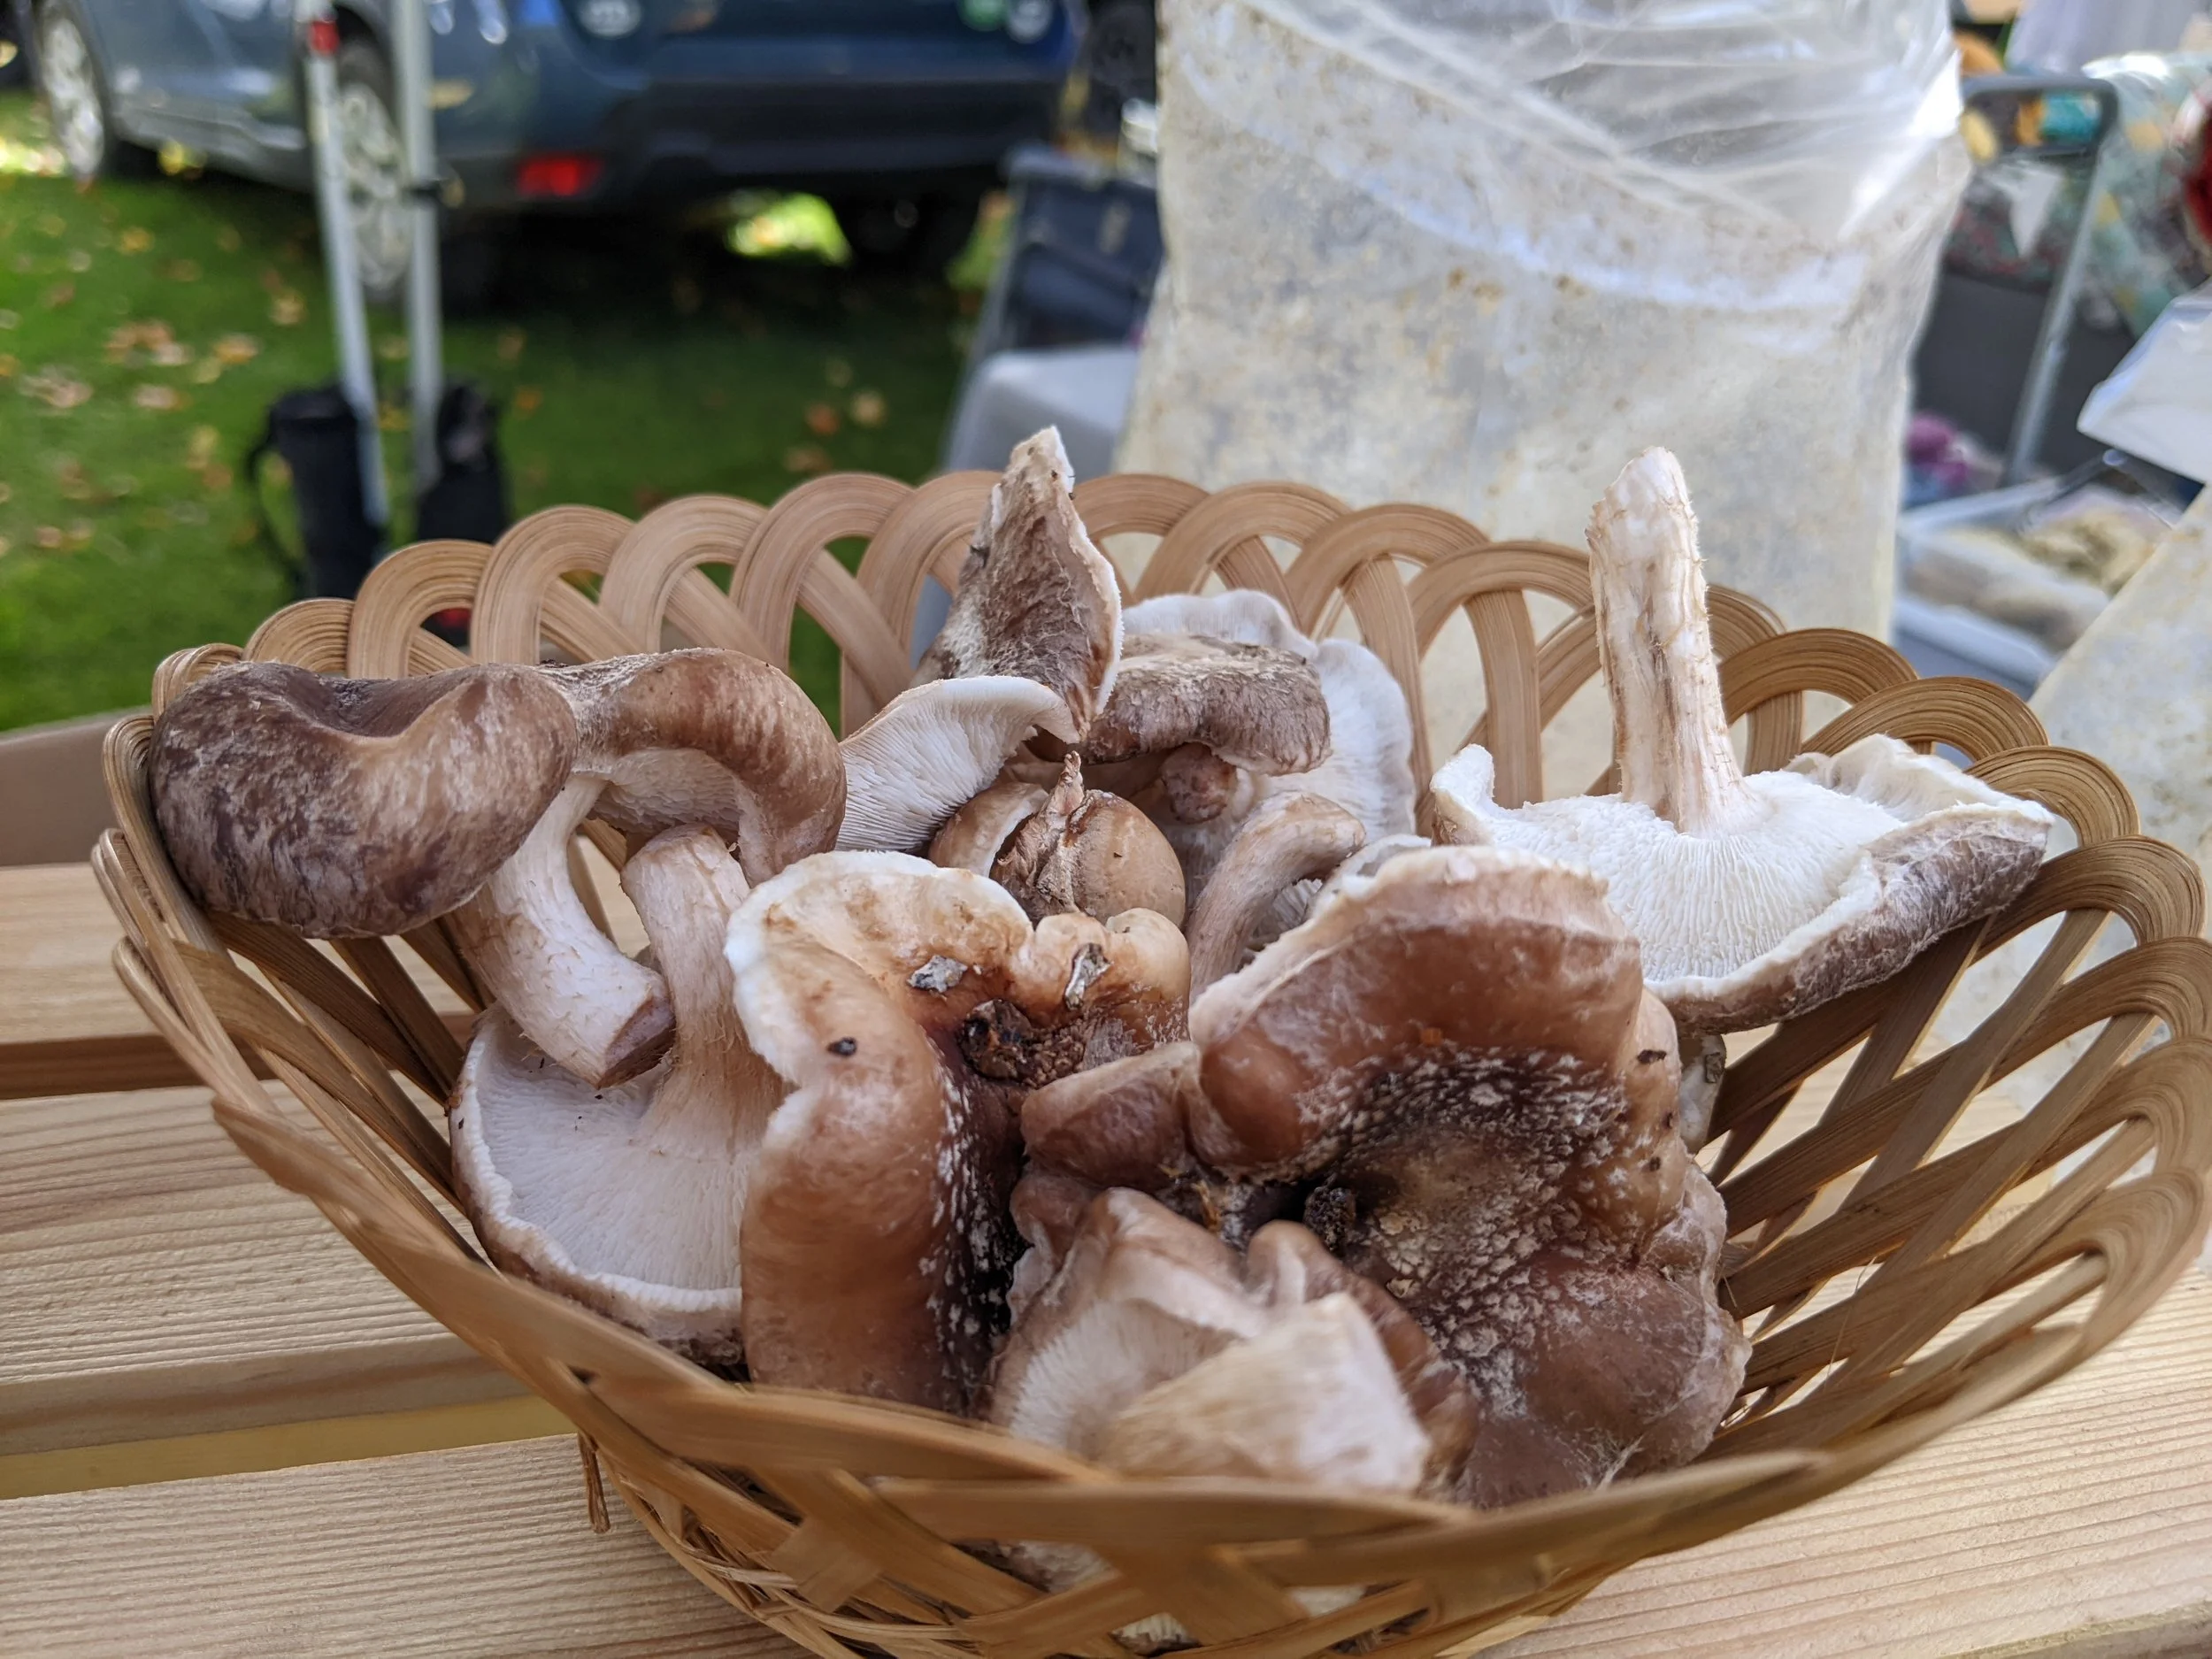
Step Five
After a week or so, harvest your mushrooms when the mushroom caps have started to unfurl, but have not completely flattened out. Flat shiitake caps may be large but will have a shorter shelf life after harvest.
We suggest harvesting with scissors, but any sharp blade will do.
After harvesting, spray the substrate block and cover it again to encourage another flush of mushrooms. Keep checking the block even if nothing grows immediately, as more mushrooms may appear in a week or two.